Friday, December 31, 2010

Happy New Year

One more day before 2011, pretty much getting older now. I be like 27 year old by next year and I don’t feel very confortable about it. But other then that it is a year me and my family been waiting for and yes pretty much something my dad been waiting for too. I hope everything will go well for this year and something to look forward too.

Looking back at my life this year, it has been pretty much ok ok I guess. Still working as a Property Negotiator and looking forward to to more by next year (Which is tomorrow lol) well not tomorrow in few months time. Lots of stuff happened this year to my family, friends and & celebrities too (Tiger woods is one of them and it is just his year haha). I manage to go travelling with dawing, then most of my childhood friends are back in Kota Kinabalu for good and working here too.

I don’t think there is anything else to mention, more ever I am going dinner with my family at Little Italy and be leaving by 6pm. I know it is going to be a traffic jam but we don’t know where else to go. Anyway wish you all a Happy New year and yes it is the year of the rabbit. So those born on a rabbit year… beware..

hehe jk xD

rabbit

Thursday, December 30, 2010

Installing Ubuntu from a Pendrive Part 2

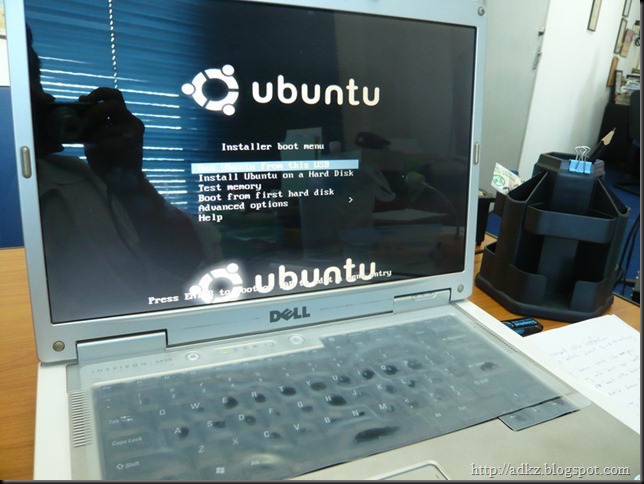
Sorry but the alcohol stopped me from continuing this post. Anyway I was talking about the menu screen after booting from the pendrive. You have a few option there:


P1000664

Choose “Install Ubuntu on a Hard Disk” and press enter, where next page would be a friendly wizard setup for you to choose how to set it up.

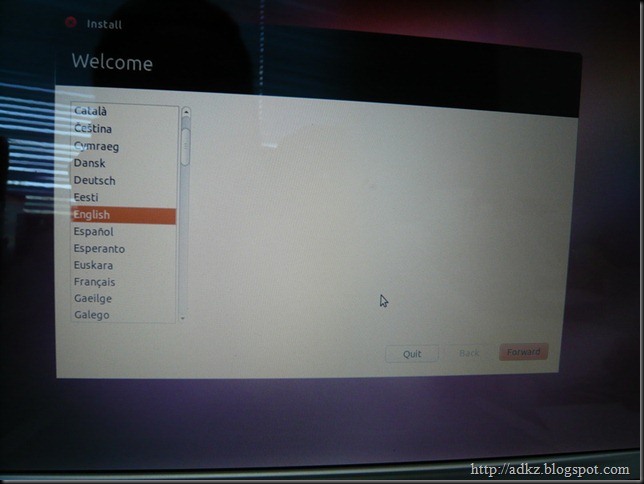
P1000665

By default the language is English so just click forward again

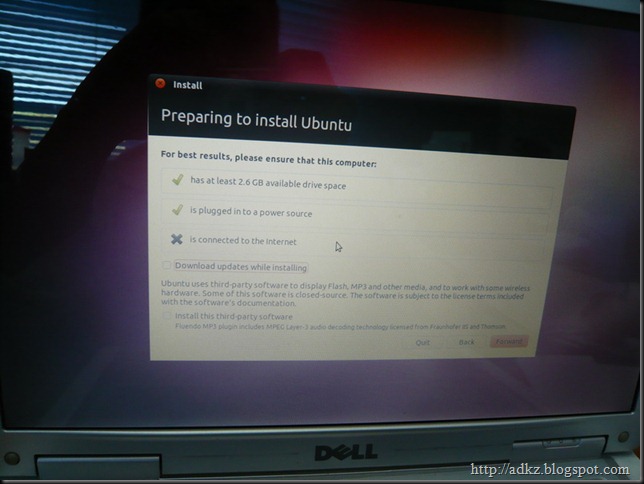
P1000666

Make sure your power source is connected if you are installing on a laptop like me!!! Also if you are using any kind of connection from malaysia, I would recommend you not to connect to the internet first as the updates could reach over 200mb and unless you are willing to wait another 30-40 minutes with a connection of 150Kb/sec download speed then go ahead. But I would recommend you to install it without doing an update as it will take some time for the installation to finish.

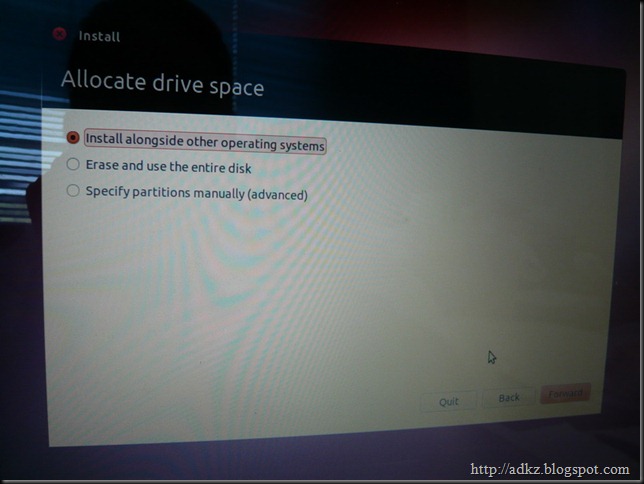
P1000668

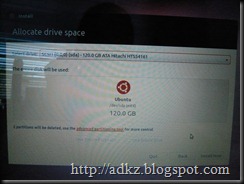
Next would be setting the hard disk space, where you have 3 option. If you think you are good enough to have 2 operating system then choose the first one. But if you are a newbie then I suggest to use the second option and don’t bother with the third because I don’t need to explain how to do it as there is a guide there telling you what to do first. Well it should not be a problem if you think it is easy.

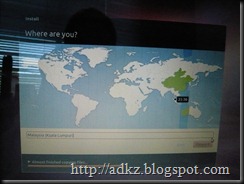
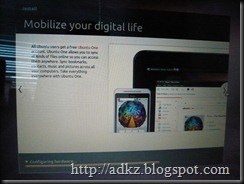
P1000671 P1000672 P1000674 

After picking which ever option or if u “choose Erase and use the entire disk” you get a screen like the first picture out of the three here. After clicking forward you be at a setup page for your time zone and then last one would be asking for you to set the computer name, your details then pick a username and password. Just for your information, you can only use a lower case word for the username. If you tried to use a uppercase letter it will not allow you to click forward. 

Once you are done setting up, it will ask you to remove your memory device (your pendrive) or any other media used for the setup. When finally it boot up just click on your username and it ask for a password you entered during the last part on above picture. Where you are finally done about 90% as the additional 10% would be some driver problem. But on my dell inspiron 6400, I had no trouble as you can see I used it for showing the installation.

I tried installing it on a Dell inspiron mini 10 (1018), the major issue I had was with the wireless card. It is a combo realtek card and yes you need to do some update with the netbook first before you can use the wireless. Check out Mini Dell forum for guide regarding this issue.


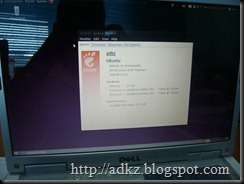
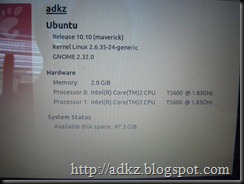
Anyway here is a picture of my laptop details after finishing installing

P1000677 P1000678

If only it had no problem with amsn, I would have just use it for my gf lappy lol

So guys Merry Christmas & Happy New Year. Wish you all will have a good new year!! Open-mouthed smile

Monday, December 27, 2010

Installing Ubuntu from a Pendrive Part 1

I guess there have been a few tutorial about it and yes I got bored and just make another one to add in more. If you a new to linux and wondering what the fuck is Ubuntu then here is some simple explanation. Ubuntu is part of a Linux Distro, where linux is a Unix-like operating systems. What is unix? Goggle that up yourself, well few years ago there were very few user friendly linux distro and yes me myself had a hard time playing with one due to the limited resource such as official driver and so on for linux based system. So now finally there have been a Linux Distro which have forum, online, and chat support available 24/7. You don’t even need to be a linux guru to install one anymore now.

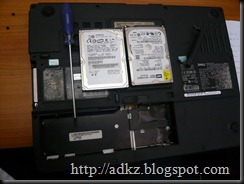
So what do we need first, hard ware part would be a spare hard disk (well that if you have one like me),  Laptop or Desktop to install the operating system (At the moment I am using Dell Inspiron 6400 with 2gb ram), a USB Pendrive with 4gb or more.
P1000655
Screwdriver, Sata/Pata Hard disk & Laptop

Now for the software part:

I think that is it… erm.. yes that is it don’t forget to download the Ubuntu iso file first!! before continue on as it is over 600mb. So lets begin with the first section.

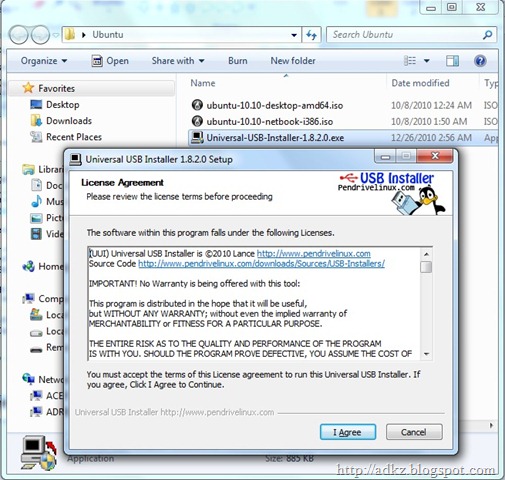
After downloading your Ubuntu iso which should be having a filename like this “ubuntu-10.10-desktop-amd64.iso” for Desktop 64bit or “ubuntu-10.10-netbook-i386.iso” Netbook Edition. Run the “Universal-USB-Installer-1.8.2.0.exe” file and you be getting a window like this:
1

It should be pretty much easy but I am just going to say click “I Agree”. Then you should get another section into the program:
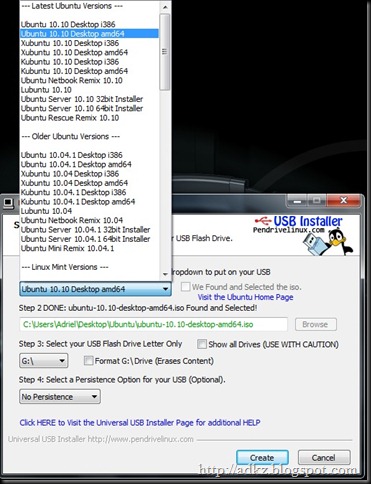
2

If you place the ISO file with the USB installer, it should automatically set the path to it and you don’t need to click on browse on step 2 anymore after choosing the version you want to install from the list at step 1 like the above picture. Once you are done setting that, on step 3 you need to pick the drive letter your pendrive is using. As for step 4, I didn’t touch it as I don’t know what is that for.
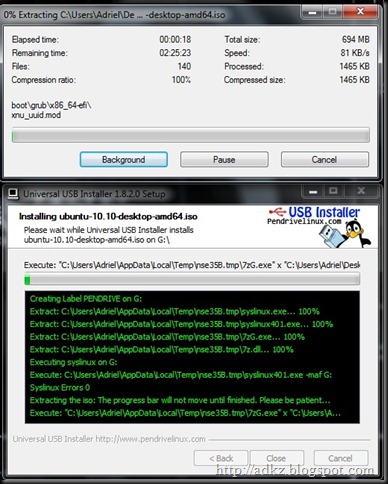
3

Now you would see it start installing all the stuff into your pendrive which might take about 3-4 minutes depending on your pc performance. Once it is done with the installation on your pendrive, just exit the Universal usb installer and restart your pc and enter into your bios setup. Most desktop would require you to press “Del” on your keyboard as the computer start and where my laptop uses F2 button. But you just need to quickly notice around the screen showing something like “F2 to enter setup” after you on your pc or laptop. 
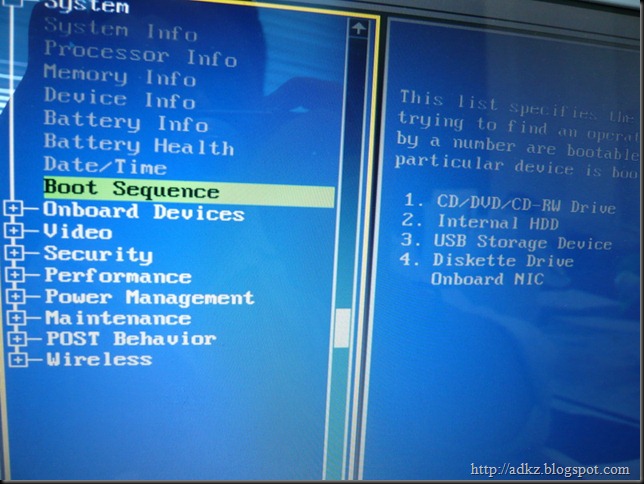
P1000656

In the bios setup you see a screen with blue background just like the above picture, then look around for Boot Sequence.
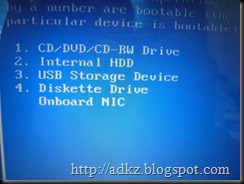
P1000657

In the boot sequence setup, move the USB Storage Device (Which means your pendrive or anything that uses the usb port with memory) to boot first and not your cd-rom or hard disk. Some motherboard may have a difference setting where you are required to enable the boot usb storage device first and it will not be located at the boot sequence section. Might be in a advance control or something like this just explore around with out changing any of the value. If you are not sure or just leave a comment here along with your motherboard model and I tell you where to go next.
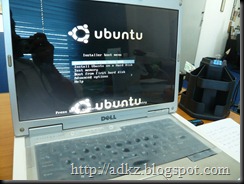
P1000664

After finish setting up the stuff on your bios do save the setting or press F10 with will save and exit the bios after choosing yes on the menu which will popup. Now once the bios screen pass by your pc or laptop would try to boot from the pendrive first (Make sure you plug the pendrive in!!) and you should get a menu like the above.

Smile


Sorry but I just notice this is going to be a very long post, so decided to make part 2 about it tonight. I have not finished uploading the video too. So just wait for part 2 lol


Reference for this post:

Pendrive

Linux Distro

Ubuntu

Unix

Netbook

 Universal USB Installer

Dell

Inspiron

Friday, December 24, 2010

6.20 TN-A / Homebrew Enabler (HEN) Released - psp-hacks

Well the latest homebrew enabler is out for psp firmware version 6.20. So what can you do? well here are the details:

"Now you can’t play any ISOs/CSOs just yet — you gotta wait for that. Someone’ll port an existing ISO loader or create a new one compatible with 6.20. Otherwise check the included readme.txt for everything else you oughta know.
6.20 TN-A (HEN) Requirements
  • A PSP – any model – with firmware 6.20 installed.
6.20 TN-A (HEN) Instructions
  1. Install Patapon Demo & HBL on your PSP.
  2. Extract EBOOT.PBP to /PSP/GAME/HEN/EBOOT.PBP, or to /HBL/GAME/EBOOT.PBP if you want to launch it directly.
  3. Launch Patapon Demo and load exploited savedata (Continue).
  4. Now it jumps into HEN mode.
  5. Enjoy homebrews and plugins (you’ll lose HEN mode if you reset/shutdown the device or if your PSP crashes).
Update: A couple notes from my personal experience with 6.20 TN-A (HEN) and a PSPgo: The first run it worked fine — HEN loaded no problem and behaved as it should. Consecutive runs thereafter (from a cold boot) always failed. To get it working again I uncommented the following line in hbl/hbl_config.txt:
override_sceIoMkdir=-1
Works again! … despite the memory leak error.
Here are some tips if you’re experiencing crashes and/or other problems:
  1. Backup whatever you want to keep from your memory stick, format it, and start fresh. Download everything you need and pack that freshly formatted stick. Restore your save games and whatever else after the fact.
  2. Fiddle with hbl/hbl_config.txt. Try changing the different overrides and other configurable options.
  3. Clear out your ms0:/seplugins folder. Some plugins may be incompatible with 6.20 TN-A.
  4. Disable vMenu (VisualMenu) if you’re using it.
  5. Sift through the comments. You aren’t alone. Many users are reporting crashes but also reporting fixes/workarounds. Take your time and read on.
Update: By way of Wololo via virtuous flame — an unofficial fix for PSP-3000 owners. 6.20 TN-A doesn’t recognize newer PSP-3000 models (it’s a 4g vs. 3g thing); this EBOOT.PBP (you’re replacing HEN/EBOOT.PBP) corrects that.
Update: Comments indicate that homebrew is still likely to crash on some (newer 4g?) PSP-3000 models, that’s after using virtuous flame’s patched EBOOT. Hang tight — you know it’ll get fixed."

You can download the files from:

For more details go to:
www.psp-hacks.com

Saturday, December 18, 2010

Dell Mini 10 (1018) Netbook

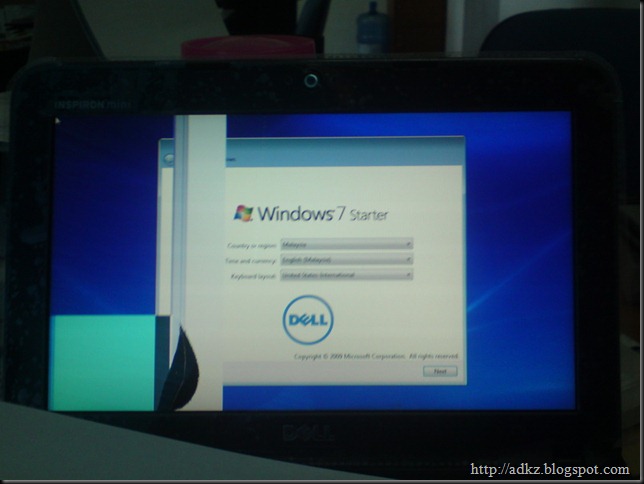
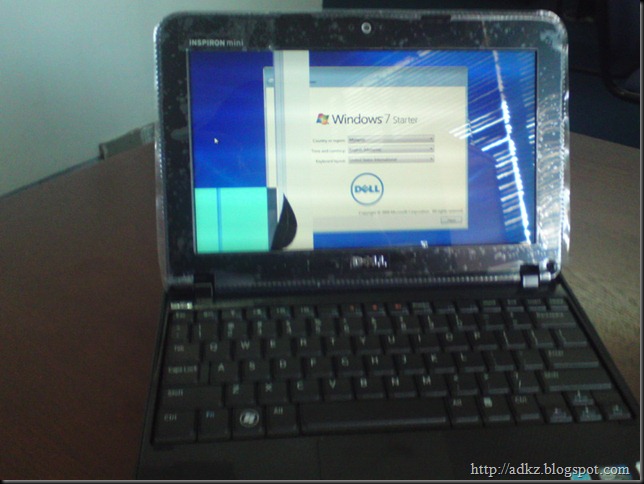
I have just receive my order from Dell this morning at 10.30am yes gave it to Griselda right away and tease her. So as I turn on the laptop, it had a very unique bios logo (Well I thought it was a Bios logo) just have a look at yourself


DSC00629

DSC00630

DSC00631


As it entered to windows for the first time the leaf look alike logo was still there. So to my horror it was a problem, now I am wondering will I get a replacement or will they ask me to send it to one of their service center to fix it?

Either way it is the first time I actually receive a faulty unit from dell. I ordered a few stuff and all had no problem I guess the person who installed this unit took thinks for granted and never tried to test it first. Where now it is a big problem for me already.


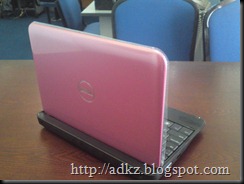
Inspiron Mini 10 (1018) Netbook
The new designed InspironTM  Mini 10 is a lightweight mobile netbook that goes anywhere with you, so it’s always easy to check your e-mail or connect to the Internet. It’s everything you need to stay in touch and entertained on the road.

  • Get more done with up to 7 hours, 18 minutes of battery life1
  • Go anywhere effortlessly with a compact under 1.33kg2 design
  • Store your movies, music and photos with the standard 250GB3 HDD
  • Be productive with an easy-to-use 92% full size keyboard

Changing blog layout

It has been a while since I actually did anything to this blog, I don't even know why do I still keep this site updated. Then again sinc...